I found the tutorials for the hair bows here and here. All it takes is some wool-blend felt, scissors, needle & thread, a hot glue gun, and metal hair clips. Give it a try. It's fun!
Showing posts with label Handicrafts. Show all posts
Friday, October 23, 2015
Itty bitty bows....
I found the tutorials for the hair bows here and here. All it takes is some wool-blend felt, scissors, needle & thread, a hot glue gun, and metal hair clips. Give it a try. It's fun!
Friday, August 07, 2015
Old Trunk Renovation...
I've had this old metal trunk for several years. It's not a family heirloom or anything, but I liked it and bought it from an antique shop basement. I've used it for a coffee table and for a luggage table for guests, but I've never stored anything in it because it STINKS! It has that musty, old, stink that just doesn't want to go away no matter what I do. I've tried kitty litter, baking soda, ground coffee, and although the stink might wane, it never has completely gone away.
Well, for some reason, TODAY I decided this musty, old trunk was going out in the hot prairie sun for a de-stinkafication session. I read lots of things to deodorize old trunks, some of which I've already tried, but I tried the new-to-me remedy of spraying vodka with clove oil all over in the trunk and then letting it sit in the sun. Perhaps a week of sunshine would get it there, but just one day didn't. Frustrated, I decided to do something drastic!
See the inside of this trunk? It's wallpapered. The entire inside has glued-on wallpaper. Of course, much of it was coming loose, but a LOT of it was well-stuck-down. I decided one of the best ways to de-stinkify this baby was to take off the wallpaper. This tray comes out and it's so warped that I may discard it or ask CarpenterSon to make me a something similar. The rest of the trunk was wallpapered too and so I began. I thought I could maybe sand it off with my disc sander. I started with the lid and it went fairly well, but OH my GOODNESS there was a lot of dust -- glue, paper, and wood. OOoooof! I didn't think I could do the whole trunk this way so I used a spray bottle and dampened the wallpaper with some water. Then DIL told me that I should add laundry softener to the water and see if it helped. I'm not sure if it did or not, but I sprayed a whole lotta water on that paper before it started to loosen. My trusty 5-in-one paint tool worked great to scrape off the paper. Still, it was a big job. Bigger than I anticipated, but that's how these things go, don't you think?
I got the majority of the wallpaper off the interior and figured I'd sand the rest off. I want to smooth the wood surface down anyway, but for today, this was my stopping point. I sprayed some Simple Green onto the wood and gave it a wipe with a terry towel just for good measure. I thought it would be helpful to further de-stink it. This evening the smell is MUCH better. I'll let the trunk dry thoroughly. I moved it into the garage for the night, but I'll set it out in the sun again tomorrow for a deep dry before I sand it down.
The plan is to stain the interior wood with a Danish Oil stain. No poly finish. They say that you ought to leave the wood to breathe without sealing it, and for some reason, that makes sense to me. I may give it a linseed oil rub down too. I'll rub some steel wool over the rusty metal parts and then clean the exterior and oil the wood and leather straps. I have no intention of changing it or adding new parts. I like the well-worn, well-used look, but I do want the interior to be stink free so I can store some things in it.
I don't know yet what I'm going to stash in it. Maybe board games on the bottom and card games on the top tray. Or maybe some quilts and blankets (depending on the smell). It would be a fun dress-up trunk too. The Grandies think it's a treasure chest so maybe I should hide some treasure in it!
What kind of treasure would you hide in a trunk?
If you have renovated a smelly, old trunk, do you have any tips?
More to come as the project progresses!
Monday, September 29, 2014
Mending li'l jeans...
I am having too much fun!
Seriously.
I love denim.
And I have always been a mender of jeans.
Lots of jeans.
Living with five kids and working
on a ranch
along with a husband who works hard,
jeans ripped
and tore
and wore out.
I have mended innumerable jeans
(meaning I have never numbered them and wish I had).
When I was in seventh grade,
I started embroidering...
on my jeans.
I drew on my jeans with a ballpoint pen during class
and went home and embroidered them at night.
I wish I still had those jeans.
Now I feel like I'm re-living seventh grade.
OnlyDaughter brought me four pair of li'l girl jeans
to mend.
And this is what I have been doing in my spare time.
Love it!
Soon I will go next door and grab the other little jeans
that belong to more of my little people
and stitch on them too.
Won't that be fun?
Yes, it will!
Wednesday, July 02, 2014
Summer is here....
It's also the time of year when we are breeding cows. The fellas have an AI (artificial insemination) program that they are following and so we've been working cows through the corrals quite a bit. We've also been vaccinating calves against pink-eye and pouring insecticide on all the livestock to keep flies and parasites away. Everything is looking so good right now. The cows and calves are shiny and fat and this is a perfect recipe for a good breeding season. The bulls are out doing their job too.
I've been fiddling around with a few sewing projects. I made a maxi skirt with a fold-over yoga waistband for myself and I really love it. I'd like to make a short version of it next. I have also been dipping into the watercolor paints lately. I saw a cool idea on Pinterest about lettering with watercolors so I made a few post cards. I need more practice, but it was fun and simple to do. I like to use the Pentel Waterbrush for this because the lettering can be made more sharp and clear.
It's almost the 4th of July and that means our Hometown, USA will have a parade with horses and cowboys and rodeo queens. There will be barbeques at home and fireworks too! Yay! We also have quite a few family birthdays this month. The two youngest sons have their 22nd and 24th birthdays on the 2nd and 3rd. Wahoo!
Tuesday, May 27, 2014
Makin' stuff....
A Pocket Tote Bag & A Patriotic Wreath
The next project on my crafty to-do list was this Patriotic Wreath, another Pinterest find by OnlyDaughter. The wreath base is a pool noodle that is taped together with packing tape and then wrapped with torn blue jeans. The flowers are made with denim and red and white fabric scraps I had. It's all hot glue gun work so that made it pretty simple to make. I added some denim flowers to my wreath which weren't a part of the original "recipe" but I liked them. Here's a link for some denim flowers to try. My flowers are smaller than this tutorial's. This wreath should take our front door all the way through summer. What kinds of creative projects are you working on?
(The Bakery, where I buy my fabric goodies)
There's been more to life lately than just makin' stuff in my workshop, but before I let them slip by, I wanted to post about two fun projects I made. I love quick-ish projects and these were fairly easy to do. OnlyDaughter found a grouping of 12 free handbag patterns on Pinterest and the pocket tote caught my eye. We went to The Bakery, our local and wonderful fabric store, to get the goods. You've heard me talk about it and I even gave you a tour of it here, so if you care to walk in a look around, you can. We girls found a fun laminated fabric for the outside of the bag and gray chevron lining for the inside of the bag. We used a charcoal gray trim for the edges and strap. The tutorial for the DIY pocket handbag is found at Flamingo Toes. It's a great little blog for sewing projects and tutorials. OnlyDaughter likes her new, plenty-o-pockets, summer tote.The next project on my crafty to-do list was this Patriotic Wreath, another Pinterest find by OnlyDaughter. The wreath base is a pool noodle that is taped together with packing tape and then wrapped with torn blue jeans. The flowers are made with denim and red and white fabric scraps I had. It's all hot glue gun work so that made it pretty simple to make. I added some denim flowers to my wreath which weren't a part of the original "recipe" but I liked them. Here's a link for some denim flowers to try. My flowers are smaller than this tutorial's. This wreath should take our front door all the way through summer. What kinds of creative projects are you working on?
Monday, December 16, 2013
Christmas critters...
I had a lot of fun stitching up these felt Christmas Critters for my grands. They're all snuggled in a basket, but pretty soon they'll be hopping into the Christmas trees of wee children.
My inspiration came from Cassie at You Go Girl. There is one free pattern for a squirrel, and if you look a little at the link, I think you'll come across an owl pattern too. The other animals I made using the squirrel pattern as a base and free-handed the rest. Choosing felt colors was fun and so was the embroidery.
Friday, December 06, 2013
Snowflake window...
Would you like to look out my kitchen window? Ok. First you have to look at the pretty paper snowflakes and then you can focus past them to the bright, snowy landscape. The snowflakes also stand out beautifully with a black night backdrop in the evening. I cut these snowflakes from coffee filters but you can use ordinary copy paper. Then I sewed down the middle of them leaving some space in between each by sewing and pulling the thread through and then sewing over the next snowflake. Here's a link to Dave's Paper Snowflake Patterns to get you started.
I have a special Christmas carol to share with you, sung by the Pentatonix. This a capella group won "The Sing Off" a year or so ago. I loved them and continue to appreciate their music -- all voice, no instruments. Pentatonix has a new Christmas album out called PTXmas. I just downloaded it via mp3 this morning and I love it. Enjoy!
Friday, November 22, 2013
Stockings...
It was a cold day here so I've been holed up in my workshop today, busily and happily creating Christmas stockings for the newest family members and giving another stocking a much-needed facelift. I mainly used felt for the stockings themselves, and for the cut-outs I used felt with heat-and-bond.
I was so tickled to be able to use a sweater collar on the cuff of this stocking. I had been saving it from when I made no-knittin' mittens last year from old sweaters. When I cut it off, I was worried that it might begin to fray. I put a little fabric glue around the cut edges, and it held perfectly so I sewed it on the front. I think it gives the stocking a Scandinavian look.
This plaid wool stocking (red felt on back) has a masculine look for the grandboy, and I just love the stag reindeer head too. I searched and searched for the pattern and finally found a copy in drawer and then hunted it down online for you in case you'd like to use it. There's a pretty poinsettia template too. Find them HERE at Midwest Living.
Are you working on some Christmas Elf Projects? Do tell!
Wednesday, November 13, 2013
Louise's new do...
Miss Bee loved her new dolly, Louise. She even loved her hair, but the yarn I used for the hair was, shall we say, extra frizzy and shedded like crazy. I told Bee's mommy that if it got too bad, we could always take Louise to the Beauty Parlor and get her a new do. And we did. Bee picked out the hair color and I like the choice. Do you?
I admit, I miss the wavy, big hair she had before (see the post below this one). I really do. But the lint and shedding was just too much. If any of you knitters or crocheters have a good suggestion for non-shedding "curly/wavy" hair yarn, I'd love to hear your ideas.
Monday, November 04, 2013
Louise, a Wee Wonderful doll...
I just love Hillary Lang's Wee Wonderfuls dollies and patterns and embroideries. Miss Hillary is such a beautiful creator of all things childlike and full of wonder. That is why I decided to try my hand at making one of her dolls. This one is from her pattern: Kit, Chloe, and Louise -- three doll ideas in one. I chose Louise although I didn't quite make her hair the same as the pattern. I wanted my dolly to have reddish-golden, curly hair, and I wanted the small hands that receive her to be able to put Louise's hair in ponytails or clippies or leave it wild & frizzy. I made Louise out of the fabrics in my stash. The only purchase I made was the yarn for her hair.
It was a fun project, but a little bit fussy for me. I guess dolly projects aren't the kind that happen over night. I must say, the pattern instructions were clear and easy to follow. Now that I have made one, I think I could make another dolly in less time since I've learned by my mistakes and successes what to do and not to do.
If you have a notion to do some sewing or embroidering before Christmas, you will find lots of lovely patterns in Hillary's shop. I've made the Seasons Stichettes, and I'm fond of a freebie, Elf Stitchette. I hope you find inspiration at Wee Wonderfuls like I have. Enjoy!
Friday, October 25, 2013
Cows, leaves, bugs, and bones...
Once the cows and calves were through the pasture gate, they immediately put their heads down and began to graze hard. There was so much grass there, they thought they had Arrived in Heaven! They had. We hope to keep them there as long as the weather permits. When the reservoirs freeze over, they'll come home where we can keep a close eye on them.
Monday, February 11, 2013
Heart making....
The Girls came over today! My daughter and her two daughters, and my DIL and her two girlies. We decided at about 9:00 this morning that we wanted to get together and have a Valentine-Making-Fest. So we did. Lots of glue and paper, bows and doilies, stickers and stamps. We got some great inspiration from Dawn at 4:53.
We added our own twists to the fancy Victorian style Valentines by adding our modern day lingo to them. That was fun! The two 'tines below will go to my single sons. Pretty good, eh?
And just for a little interest, I'm adding some sheepie fun! We had 5 ewes drop lambs today. One single, 3 sets of twins and one set of triplets. This lamb was one of the triples. He's all wet except for his fuzzy head. Momma Sheep got that part cleaned up first.
"Baaa!"
Friday, January 04, 2013
Start where you are...
(Source)
"Start where you are. Use what you have. Do what you can." ~ Arthur Ashe
(Don't you love this quote? I'm writing it down.)
"Start where you are. Use what you have. Do what you can." ~ Arthur Ashe
(Don't you love this quote? I'm writing it down.)
I'm not a resolution person. I'm not a theme person or one who chooses a word for the year. I wish I was, but that's just not me, really. I do have some thoughts about what I'd like to do in the year to come. I read the Susan Branch post, The Care and Feeding of Dreams, and I realize that I like her approach to living life fully whether that means treating yourself to the occasional bubble bath & book, breakfast in bed, daily walks, or by setting Big Dream Goals like writing a book, one little page at a time. As a fifty year-old lady with grown children and four grandchildren, it has become easy to leave dreams behind and focus mainly on "the here and now." For me, the here and now is very important, but having a few dreams to feed keeps the soul awake and energized and gives me something creative to look forward to.
I haven't officially written down any of my projects or any of my dreams either, but I'm thinking about lots of things. Since October, Hubby and I have been eating better and we've both dropped quite a bit of weight. We feel good and more ambitious and fit, even though we both have 50 year- old ranch-worn bodies that will never look like they once did at 30 years old. Still, we are planning to press on with a lifestyle of healthy eating. I've been researching Clean Eating which includes, in a nutshell, eating a variety of whole foods and eliminating most processed foods. This is mainly what we've evolved into. If you are what you eat, then we've gone from Mr. Pop & Candy and Mrs. Chip & Dip and transformed into Mr. Steak & Salad and Mrs.Veggie Omlet. Food tastes better to us now, and our tastes in food have changed dramatically. I'm looking at sourdough recipes and experimenting with those. The summer garden will be fun as always. I'm anticipating new ways to feed the dream of healthy bodies with new whole food recipes this year. Check out these "clean" Budget Recipes.
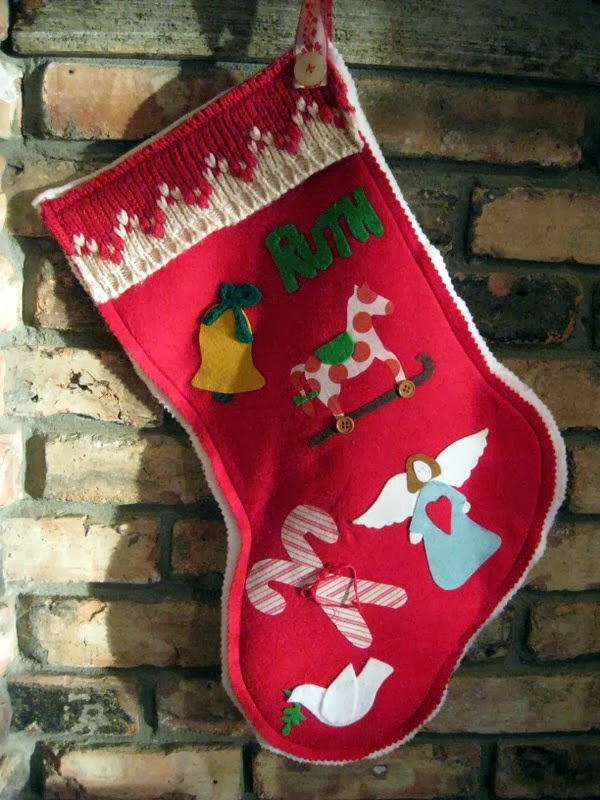
Our newest grandbaby, Ruth., is such a good one! She's nursing and pooping and sleeping just like newborns are supposed to do, and she's such a pretty lil thing. I was at her house yesterday, and I got to talk to her and tell her how wonderful she is. She was wide-eyed and alert as she tried to focus on her granny's voice and face. Her big sister and I had lots of fun looking at the new Eye Spy book and singing songs before nap time. The neighbor grandgirls spent the night with us a couple days ago and even though they were just recovering from a nasty cold/flu bug, we had a good time dancing to Elizabeth Mitchell songs and singing Car Car, You are My Sunshine, and Little Sack of Sugar. What I love about having my grandchildren nearby is that one of my biggest dreams of being a Grandma has come true, and the best part is that we are so close. I feed the Grandma Dream often and much.
Because I really love to embroider, I'm planning to always have a project going, even if it is just tea towels. This Christmas it was nice to have a stash of handmade tea towels at-the-ready to give as gifts, and I want to continue keeping a stash for gift-giving anytime. I always feel like I give a little piece of myself when I give a handmade embroidery. The time and joy I put into it is part of the gift. Oh, that reminds me of the funniest little sew-on labels that I thought would be fun to sew on handmade gifts. The one I especially like says: THIS TOOK FOREVER. How's that for funny and true?
Blogging will stay on my list of things I want to do. I enjoy having a journal of my days, and I like having a place to share ideas and things that I like to do....like ranching. We will be moving into Lambing Season very soon. February 10th or so will be the starting date for new lambs to arrive, but before that we will get the sheep sheared and the shed set up for the big event. It is the Kick-Off Event for the year because right after that, there are heifers to calve and then the cows, and the year is on a big roll because there's no stopping the rest of the events that follow. That's the thing I love about ranching -- there's always something new coming up. It's mostly the same stuff, but it's never dull. There is a steady rhythm to it and yet there is anticipation and excitement.
I think I need to find a pretty notebook so that I can start writing down a few thoughts and ideas, some dreams and projects, and maybe add some encouraging words and pictures. It's good place for me to start -- having a spot to at least write things down and begin. I hope your year is beginning well, young as it is.
Labels:
Around Home,
Food,
Good Things,
Grandchildren,
Handicrafts,
Home and Family,
Quilts
Wednesday, December 26, 2012
From the workshop...
A little girl's play kitchen made from a 1970s thrifted coffee table.
More play kitchen ideas here.
Dolly diapers, pattern here.
Dolly crib, pattern here.
My carpenter-son helped me with this one.
Bibs for a new baby boy. Tutorial here.
This granny had a lot of fun getting creative this Christmas season.
Monday, December 03, 2012
Starz...
It's time to be making paper stars again. This is a re-run of an old post, but with some updated photos. This is a fun project to do with kids and the results are very impressive.
What you will need:
Star pattern
Card stock
pencil
scissors
exacto-knife or sharp knife
adhesive spray
clear crystal glitter
What to do:
You will want to begin this project by finding a good five-point star pattern to print and trace. I found three sizes here and a large star template here. Just print stars onto card stock and cut them out or you can cut them out and trace several on a sheet of card stock.
Lay your star onto a cutting board. Take a heavy ruler and lay it across the star at each point and angle. Gently score with an exacto-knife or sharp paring knife, making nice, straight lines through the middle each time. Next, you will gently fold the star on each line and then lay it on the table to squinch up the star so that each point is folded upward and each angle is folded downward. You'll see what I mean when you start to play with your stars.
Now the fun begins! Take your folded stars, newspaper, adhesive spray, and glitter and go to the garage. The smell of the spray is a little strong so you want to do this in a well-ventilated area. Spray a light coat of adhesive onto each star and quickly sprinkle clear crystal glitter over each one. Shake them off and turn them over onto a dry sheet of newspaper to glitter the backside if you want to. Allow your stars to dry indoors especially if it's cold in the garage. Pour your excess glitter back into the bottle.
You can set up your stars on a mantel, shelf, or hang them by punching one tip of your star with a needle and thread. Hang in windows at varying lengths for a pretty effect. I have also hung stars on the Christmas tree. I think they'd be cute on a gift or tucked into a wreath. These are every bit as attractive as the tin stars that I have seen in gift shops.
I made a new tree topper today out of pages from an old hymnal and then glued a glitter star into the middle. I was inspired by Dawn at 4:53. I'm happy! You too?
Subscribe to:
Posts (Atom)